Category Archives: Lavinia

A couple of brayered cards

bridge1sml
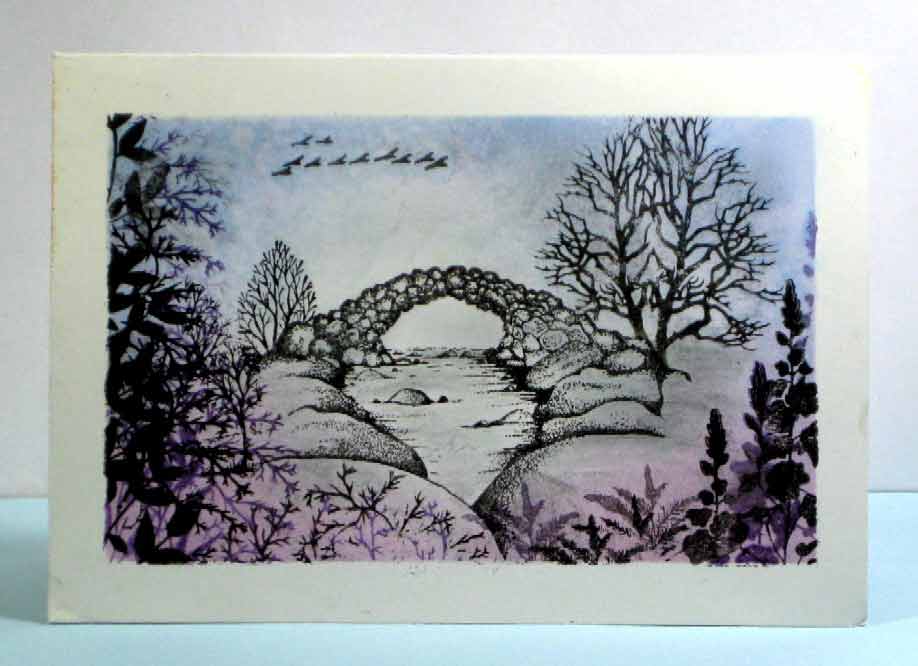
I have been playing with my brayer again today as I need the practice. As you can see I have used a grubby old piece of card for this one and made a few mistakes too. Maybe I really shouldn’t show you my mistakes but I hope you won’t make the same ones as I did. The tree on the right is too big and not well positioned or stamped well. Some of the foreground stamped images look squished – that is because I put too much pressure on the acrylic stamp and the ink pad was quite juicy. I thought I would give it a light spray with water to give a nice effect in the sky but only sprayed it after I had taken the masking tape off so the colour bled out. The left hand side looks too black. The flock of birds are positioned too high. Having said all of that I still quite like it even though it was a different flock of birds stamp that I had intended to use.  I will try and save it somehow.

Inks: Versafine onyx black and Imperial purple, Stampin up Pale plum and Bashful blue, Memento London fog.
Card: white silk card
Stamps: Lavinia stamps bridge , flowers and foliage, Stampin up trees, Encaustic art tree, birds stamp from an Oriental collection
Other: spritz of water, glitter pen just over the stream

sunsetsmlThis design I found on you tube by stampwithtami – I wanted to see how other people used their brayer so I had a go at this one.
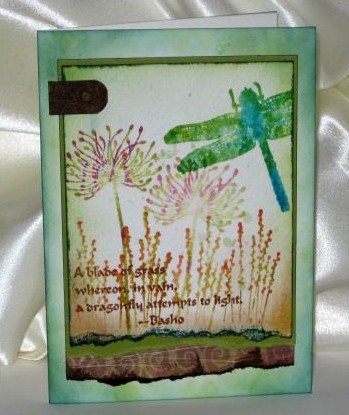
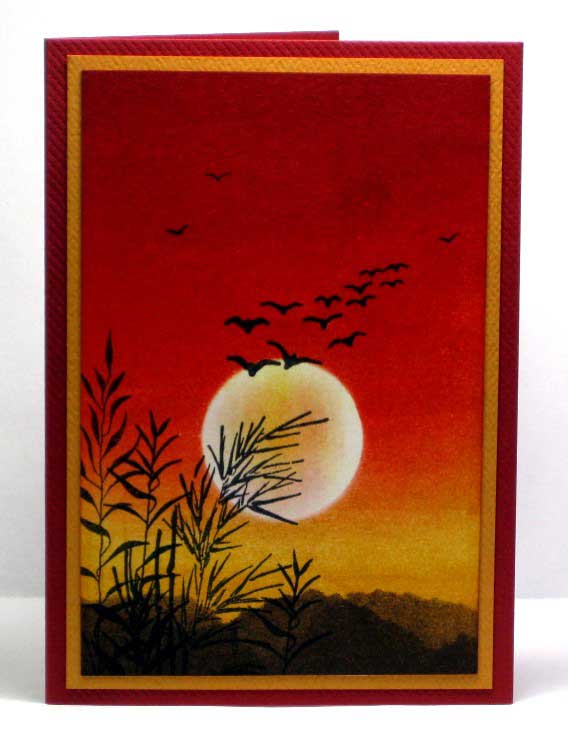
When I went straight down with the yellow colour on my brayer my sun mask shape rolled down too to give a very slight moon underneath but I think I covered it well enough. The red looked a bit stripy so I turned it to landscape and rolled it from the small edge inwards rather than down from the top in portrait orientation. This looked a lot smoother.

Inks: Versafine onyx black, Stampin up More mustard, Adirondack Expresso and Red pepper
Card: White card, mustard card, red card
Stamps: Lavinia foliage and birds (found it!) , Judikins bamboo,
Other: punched hole mask

Fairy garden card

fairyGardenSml
Today I have finally had time to play with my new Lavinia stamps that I bought ages ago. I have mixed them up with other stamps which I think go really well together. Although I have added my copyright to this image I did get the original idea from some of the cards in the gallery over at Lavinia stamps. Check out her secret garden cards they are lovely. In fact they are all beautiful and my wish list just keeps getting longer.
This card will be winging it’s way to the Greek islands to Lizzie, my fabulous friend, who will be on holiday on her birthday.

Inks: Versafine archival onyx black, Stampin up Mellow moss, Certainly celery and Pale plum, Adirondack Woodlands
Card: white silk card, ivory card, black card
Stamps: Lavinia stamps, R.S. Tapestry stamps, Basic grey flourish corners
Other: pearl embellishments, Distress stickles Rock candy, Broken china and Peeled paint

Water colour dragonfly

dragonflyTornEdges1

I made this card a few days ago for a friend’s birthday using the water colour technique on Tim Holtz blog September 2008 technique challenge

Inks: Adirondack; red pepper, bottle, lettuce, oregano, stream, stonewashed, terra cotta and wild plum, and Archival coffee for the quote
Stamps: Lavinia stamps dandelion, Stampin up Pocket silhouettes and a free dragonfly stamp from craft stamper (I think)
Cards stock: old olive, plain white and scraps of brown paper
The scrap of paper and a beige brad have been coated in embossing ink and distress powder to give a nice texture to the embellishment..

Fungi scrapbook page

bracketFungiSml

So I have finally managed a scrapbook page using the napkin method demoed by Pam (thanks Pam) at the Edinburgh scrappers crop ages ago. Even though I used mat mod podge it is still rather glossy, hence the bright patches in this picture.

Inks: Adirondack woodlands, Archival ink coffee
Stamps: Stampin up pocket silhouettes, Tracy Dutton mushroom stamps from Lavinia stamps
Card stock: stampin up; creamy caramel, chocolate chip, sage shadow
Charms: dragonfly from Crafts by Carolyn, mushroom from ebay
Materials: napkin from a napkin swap, mat mod podge

Take a 3 ply napkin and peel the layer with the image on it from the other 2 layers. Roughly cut out the patterned bits you wish to use and paste mod podge on the areas of your page where you want to put the napkin. Gently lay the napkin on the mod podge and squidge it around to create a little texture. leave it to dry and paste a little more mod podge over it. It goes semi-transparent so you can still see what lies beneath it.